This is a bit like Star Wars - the beginning is in the middle.
When we bought the house, it had the 4m x 5m shed out the back. It was just a tin shed with a concrete slab, roller door and side door. Standard stuff. That wasn't what I saw though. I could see my N Scale empire. The first 3 weeks after putting the deposit on the house was not restful. I kept thinking about what I could build and how I would overcome some problems. The shed was red hot in summer and freezing in winter. There was no power. How do I seal around the roller door? What about insulation? Air conditioning? Who's the worlds second worst carpenter? There must be one or two blokes worse than me! What about the guy in Queensland that sells all the pre-cut timber for layouts - is that a goer? I went to work very tired on many days.
Doug and Fitzy were an enormous help to me. Doug is a great carpenter with a keen eye for detail and Fitzy is terrific at planning and building layouts. We dug a trench and buried the power in conduit. and pre-wired the cable to the 5 double powerpoints and 8 flouro double light fittings in the shed. A sparky came along and added a new circuit for the shed and a/c. We installed timber framing and added insulation and lined the shed. After 2 years (that's not days, weeks or months!) I finally got someone to install the a/c.
Let's go back to me not being a flash carpenter. I considered layout height and figured that I should make under the layout storage space finished with cupboard doors. That was a really cool idea. The first cost of $2,500 for doors without fittings or other timber to hold the layout off the ground, sent shivers down my spine. There had to be another way.
I considered buying shelving from the local 2nd hand furniture store, but nothing matched in height, width, or depth that I wanted. I kept returning to the store every few weeks to see if anything new had arrived. Then I saw some steel cabinets with roller shutters. They were about 900mm (3 feet) high. That was going to be too low for my needs. But it still seemed like a good idea.
I returned to the store one day and there were several 1350mm (5' 3") high similar cabinets. Eureka. I had a plan. I ended up buying 15 of those cabinets. I built the layout on top of the cabinets. That added another 160mm (5") to the height. Houston, we have a problem. I'm only 5'7" (I can't be bothered figuring that out in metric). If I stood on tip toes, I might be able to see the alignment of the turnouts - might that is.
So I built a false floor 100mm (4") off the slab. I can see! I can see! My carpentry skill had improved and I had the floor down in 2 weekends. Thanks for your tips Doug.
It's not really pink - the colour has gone screwy. The written sheets on the cabinet are my 20 rules for layout construction. I think that I have kept reasonably well to the rules.
The cabinets became the storehouse for my modelling bits.
The a/c is set to 19 degrees C in winter and 23 in summer. Because it runs 24/7, I found that it doesn't use too much electricity. I fact when I checked my first account with the a/c running, I didn't notice any difference to the previous period. I haven't checked since. Maybe I just don't want to know!
I solved the problem of sealing around the roller door. I sold it. Filled the hole in with the same sheet steel and kept on working.
Kits in the cupboard. i might even make the time to build them one day.
I thought that I should show you some early concepts for the layout. In some ways, that was the best fun. It didn't cost anything and I could even sit in a train and do 'what if' doodles.
An early concept sketch. I wanted empties out and loaded into the power station.
Another early concept sketch. The 'L' shape in the centre is my switching layout inside the house. I was considering utilising what was already built and adding on to that.
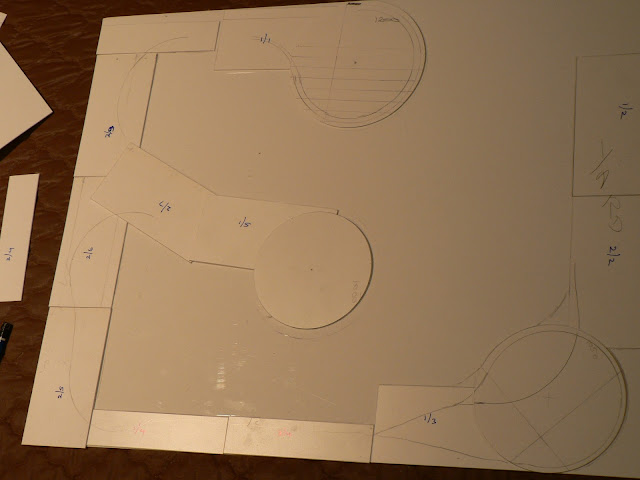
I got sick of drawing, so I cut out some styrene shapes to match the cupboard size and circles for track radius. That was much easier to do a 'what if'.
It was important to have room to move around if more than one operator was driving.
The track plan continued to evolve to what it is now. I only have one small section to finish to make me happy.
The main yard
The birds eye view of the main yard. The Digitrax Zephyr sits in a drawer under the yard. Three UR91's are also used. One at either side of the peninsula and the other at Fitzy's Staging.
Fitzy's Staging. 4 tracks at 2 levels to make fat fingers fit to make up trains.
This Roscoe with 3 roads and the elevated main. I don't have to reach across the main - one of my rules.
The peninsula will have a scenery divider from the green pin on the left corner to the buildings against the wall. From this side you will see the power station. That is the end of the layout. the other side of the green pin is Roscoe where the coal is unloaded from barges and loaded into the coal trains.
The exposed wiring will be covered. A soldering iron melts the foam and a trench is formed to bury the wires.
Fitzy's staging with styrene 'don't jump' rails to keep the rolling stock where they belong.
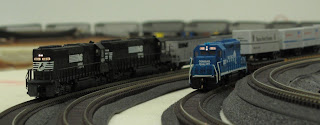
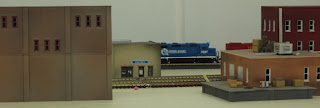
A couple of running shots. The buildings are just for show at the moment.
That's all for now.
Happy modeling.
Peter


No comments:
Post a Comment